The Shortest Path from Markdown to a Print-Grade PDF Book
If you already write in Markdown but keep wrestling with 'the last step — typesetting,' here's a route that folds the whole pipeline into one app.
The Shortest Path from Markdown to a Print-Grade PDF Book
By 2026, Markdown has become the de facto writing format for many technical authors, researchers, and independent publishers. Its advantages don’t need restating — plain text, openable in any editor, version-control friendly, not held hostage by any tool. But once you’ve written a book in Markdown, how do you turn it into a print-grade PDF a press can accept? Two long-standing paths dominate, and each has its cost.
The first is a pure command-line Pandoc + LaTeX pipeline. Convert Markdown to LaTeX via Pandoc, then compile to print PDF with XeLaTeX or LuaLaTeX. This path is popular among technical authors and can produce print output close to professional typesetting. But the learning curve is significant — you need to know LaTeX templates, fontspec, geometry, bookcover, and many other packages, and CJK projects also need ctex or luatexja. Every layout adjustment (line spacing, chapter-start page position, font substitution) means going back to the template and editing LaTeX code. Iteration speed isn’t high.
The second is Markdown writing + Word/InDesign typesetting. Finish the Markdown manuscript in Typora or Obsidian, export to .docx, then do the final typesetting in Microsoft Word, Adobe InDesign, or Affinity Publisher. Every step is visible, but the handoff cost across the whole chain is high — every revision means re-exporting and re-tweaking typesetting details, and the sync cost compounds.
Around the tradeoffs of these two paths, a few tools in 2026 aim to compress “Markdown writing → print-grade PDF” into a single app — no LaTeX, no handoff to Word or InDesign, no bouncing between writing and typesetting. The piece below covers four dimensions.
Why Markdown as the source format
Markdown’s fit for long-form writing isn’t about “simple syntax” — the syntax is simple, but that’s not the core. The core is the combination of the following:
- Plain-text portability — ten years from now, as long as a text editor exists, the manuscript opens. Proprietary formats (
.scriv,.atticus,.vellum) can’t offer that long-term readability. - Semantic structure —
#means chapter,*means emphasis,>means blockquote. These markers aren’t visual decoration; they’re semantic labels that templates can render in different forms (one for ebook, one for print, one for web). - No friction with version control tools — Markdown is line-level text, and Git can show exactly which word changed in a paragraph. Word’s
.docxis a zip, and diffing is hard. - No typesetting distraction while writing — in Markdown you don’t think about font size, line spacing, or typeface; you focus on content. Typesetting is handed off to the back-end template.
But Markdown doesn’t fit every scenario. If your project involves complex multi-column layouts, lots of mixed text and figures, or requires precise positioning of every line (poetry collections, picture books, art books), Markdown’s expressive power will feel insufficient. It fits best for text-dominant, clearly structured, chapter-based long-form work — novels, nonfiction, textbooks, technical works, research monographs.
The cost of Pandoc + LaTeX: flexible but high-threshold
Pandoc + LaTeX is the most powerful option on the Markdown-to-print path, hands down. It can produce nearly any PDF form — any font, any size, any chapter style, any layout rule, all via templates. Many university presses, technical-book publishers, and serious nonfiction publishers have used this path for years.
But the cost is real:
- The LaTeX template learning curve — a basic usable book template runs 200–400 lines of LaTeX covering document class, fonts, geometry, chapter styles, headers and footers, table of contents, citations, and more. Writing one from scratch takes weeks of getting familiar.
- Every layout change means editing code — want the chapter heading slightly larger? Back to the template, change
\titleformat. Want each chapter to start on a recto page? Insert\cleardoublepageat the right spot. Layout changes aren’t clicks — they’re code edits. - Error diagnostics aren’t friendly — LaTeX error messages are hard for newcomers; a missing brace can produce a dozen lines of error log.
- CJK handling needs extra configuration — Chinese needs
ctex, Japanese needsluatexja, Korean needs kotex. Each language’s integration details differ.
If you’re willing to invest weeks to months for ultimate layout control, Pandoc + LaTeX is irreplaceable. If you’re not, you need a shortest-path option that doesn’t require learning LaTeX.
The integrated path: the writing pane is the typesetting pane
The integrated design philosophy: let the writing pane and the typesetting pane coexist in the same application. Your left hand types Markdown, your right eye watches that Markdown’s appearance in the final print layout. Every keystroke reflects in the preview within milliseconds, including fonts, line spacing, paragraph indent, and chapter-start page details.
The advantage of this design isn’t “fewer tools” — it’s feedback cycle. In a Pandoc + LaTeX pipeline, from “change a line” to “see the changed PDF” is a full compile, anywhere from seconds to tens of seconds. In an integrated app, that feedback is immediate. For long-form writing, that difference in feedback cycle determines whether the layout adjustment you want to make actually happens or gets pushed off.
There’s a cost, of course: an integrated app’s layout expressiveness usually doesn’t match LaTeX’s. If your project needs LaTeX-only layout capability, the integrated path may not cut it. But for most “text-dominant” long-form, integrated tools’ layout capacity already covers print needs.
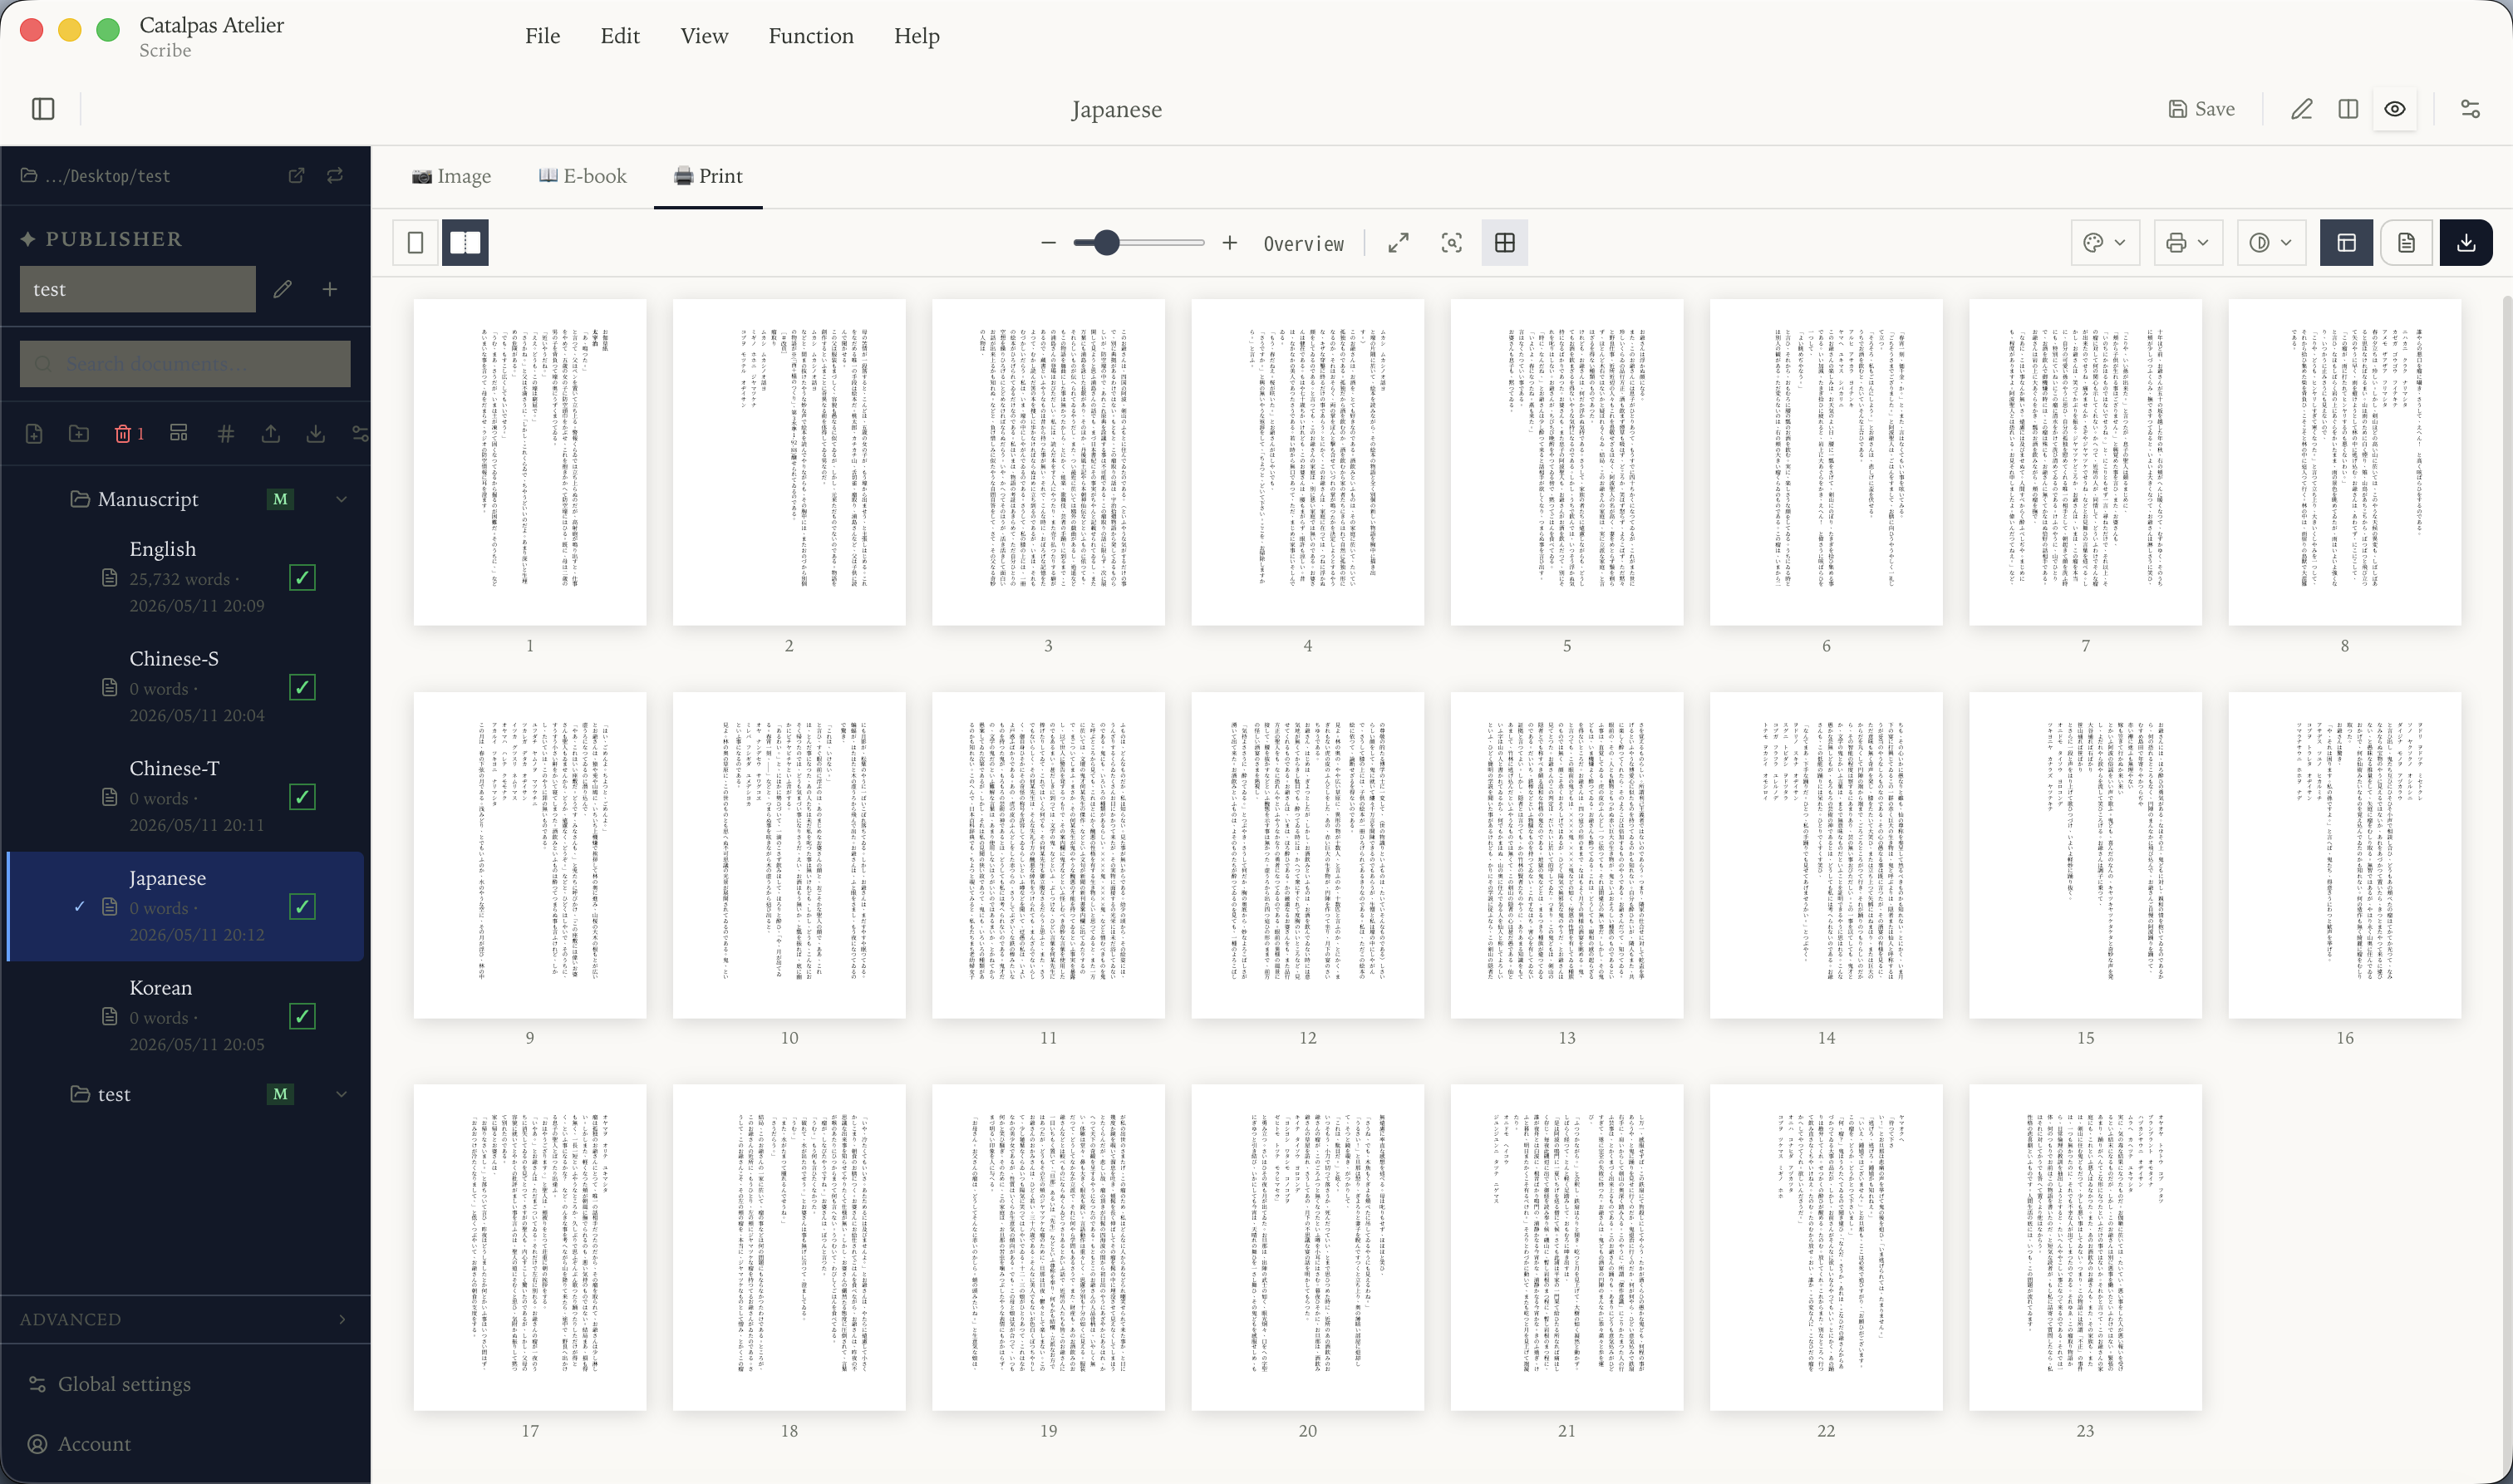
Catalpas Atelier Scribe: Markdown-to-Print, Integrated
Catalpas Atelier Scribe is a three-platform native desktop app designed around this path: writing pane + live print preview + print-grade PDF export, all running on top of a Markdown source.
Markdown source, native on three platforms
One .md file per chapter, openable in any editor, Git-friendly, recognizable by any sync tool. Windows, macOS, and Linux all have native clients.
All tiers: CJK vertical + Markdown writing + image export The Free tier is already enough to complete a project’s writing phase — all basic Markdown syntax, CJK vertical typesetting, and image export (paged + long image) are available on Free.
From Plus: EPUB 3 + grayscale / RGB PDF Plus unlocks EPUB 3 and grayscale / RGB PDF. Most standard novels and general nonfiction print needs (black-and-white interior, cover handled separately by a designer) are fully covered at Plus.
Pro: the full print-grade PDF pipeline Projects with higher print requirements need Pro. Pro offers:
- CMYK color space + ICC color management — the printer-specified ICC profile can be loaded, ensuring printed colors match expectations.
- Custom print masters — trim size (standard KDP/IngramSpark sizes preset), facing-pages settings, binding-side switch (left- or right-bound; CJK vertical defaults to right-bound), bleed range (typically 3mm), gutter (extra margin on the binding side), automatic registration marks.
- Custom font import — load the printer’s specified font or commercial fonts you’ve purchased directly; fonts are embedded in the PDF.
- Live LaTeX formula preview — math formulas render in the preview pane within milliseconds, and stay as vectors in the exported PDF and EPUB.
- Ruby — for CJK projects, ruby (phonetic guides, furigana) is covered in both EPUB and print PDF export.
Pro is $79.99/year early-bird, $129.99/year regular. Compared with InDesign Single App at $22.99/month ($263.88/year), the price is roughly half.
Key print-master parameters you actually need to know Even when the tool automates most things, an author should know a few key parameters:
- Trim size: commonly 6×9 inches (US trade paperback), A5, B6 (common in Japanese);
- Bleed: 3mm (IngramSpark standard);
- Gutter: increases with page count — a 200-page book gutter around 13mm, 400-page around 19mm;
- Color space: printer-specified ICC;
- Font embedding: all fonts used must be embedded in the PDF.
Scribe Pro makes these visible-but-defaulted settings — authors don’t start from zero, but the system isn’t black-boxed either.
Making your choice
The shortest path isn’t absolute — it depends on the learning cost you’re willing to invest and how much layout control you need.
If you’re willing to invest time for ultimate layout control, the Pandoc + LaTeX pipeline remains irreplaceable, especially for projects involving complex multi-column layouts, technical-book typesetting, or serious academic publishing.
If you’re already on Word + Vellum/Atticus and it works, there’s no need to switch to Markdown — good workflows don’t need replacing.
In the following cases, the integrated Markdown-to-print path may be the better fit:
- You already write in Markdown and don’t want to return to Word for typesetting;
- You value the feedback cycle between writing and typesetting and don’t want to endure the “export — compile — view” loop;
- Your project involves CJK vertical typesetting, ruby, or LaTeX formulas — one or more;
- You need print-grade PDF (CMYK, ICC, custom master) but don’t want to learn LaTeX;
- Your device mix spans Windows, macOS, and Linux;
- You value long-term source portability and don’t want to be locked into a proprietary format.
Start from the Free tier — the basic writing capabilities are already complete, enough to verify whether the whole workflow fits. Once confirmed, upgrade to Plus or Pro to unlock the export capabilities you need. Write a few chapters in it and see whether it fits your rhythm.
Further reading:
- Local-first writing tools for novelists: keep your manuscript on your computer
- Export EPUB and print PDF from one source manuscript: an indie author’s single-file workflow
- Typesetting software worth using at a small publisher in 2026
- The Scribe solutions hub: find your entry point by workflow
Try the same workflow in Scribe — Free to start, Pro early-bird locked in →